
How to Remove Bubbles from Decals Without Replacing Them
Written by eSigns Editorial Team • Published on April 7, 2026
At a Glance
- Small bubbles don’t mean your decal is ruined; most can be fixed with the right technique.
- Trapped air, surface issues, and temperature are all causes of bubbling and require different fixes.
- Window and vehicle decals are the most common trouble spots, but they’re also the easiest to rescue.
- Knowing when to fix vs. replace a decal can save you money on reprints.
- Simple tools make a big difference in results.
Seeing bubbles when you think you’ve applied decals perfectly can be frustrating, especially if it appears on storefront windows or company vehicles. However, those bubbles are completely fixable.
So how do you get rid of bubbles without peeling the decal off or ordering a costly reprint? This eSigns guide explains why bubbles happen, how to remove them safely, and how to prevent them to keep your decals looking smooth and professional, while saving you money.
Why Proper Decal Removal Matters
Car decals — especially vinyl vehicle graphics — are designed to adhere firmly. Their durability is great when they’re in use, but improper removal can result in:
-
Trapped Air
This happens when air is caught between the decal and the surface during installation. These bubbles usually show up immediately and are the easiest to remove.
-
Temperature Changes
Temperature changes, direct sunlight, or installing on a cold or hot surface can cause vinyl to expand or contract hours later. These bubbles usually appear when the decal looks fine at first.
-
Surface Contamination
Dust, moisture, or residue prevents the adhesive from sticking properly. These bubbles often feel firm and don’t move easily when pressed.
Not every bubble requires replacement, and knowing which ones are fixable can help you avoid unnecessary reprints — especially for larger windows and vehicle graphics.
What You’ll Need
You don’t need professional tools to fix most decal bubbles. In fact, many fixes can be done with items you already have on hand:
- A squeegee, plastic card, or even a credit card
- A soft microfiber cloth
- A straight pin or fine needle
- Mild heat (hair dryer or heat gun on low)
- Patience — rushing causes more damage than bubbles do
Tip: Avoid using sharp blades or excessive heat. Both can permanently damage vinyl.
Step-by-Step: How to Remove Bubbles from Window Decals
Window decals are common in retail and restaurants — and fortunately, glass is one of the most forgiving surfaces.
Step 1: Test the Bubble
Lightly press on the bubble with your fingertip or card. If it moves or shifts, it’s trapped air — which means it’s fixable. However, if it feels solid and won’t move, there may be debris underneath, in which case a different approach is required.
Step 2: Push Air Toward the Edge
Wrap your squeegee or card in a soft, microfiber cloth. Starting from the center of the bubble, apply gentle pressure outward toward the nearest edge of the decal.
Use short, overlapping strokes, and don’t rush. Most small and medium bubbles will disappear at this stage.
Step 3: Use a Pin for Stubborn Micro-Bubbles
For bubbles that refuse to budge:
- Sterilize a fine pin
- Prick a tiny hole at the edge of the bubble (not the center)
- Press the air out toward the hole using light pressure
The hole is usually invisible from normal viewing distance once the vinyl settles.
Step 4: Apply Gentle Heat (If Needed)
If the decal feels stiff, especially in cold weather, use a hair dryer on low heat.
Warm the vinyl slightly, then repeat the smoothing process. Heat softens the adhesive and helps it bond evenly to glass.
Step-by-Step: How to Remove Bubbles from Vehicle Decals
Car decals can be trickier because of curved surfaces, temperature exposure, and softer paint finishes. Heat can make the vinyl stretch, which causes more trapped air.
Step 1: Park in the Right Conditions
If possible, work indoors or in the shade. Avoid direct sunlight and make sure that the surface is cool to the touch.
Step 2: Push Toward Edges or Seams
Use steady, angled strokes with a squeegee or card to guide the air toward trim lines or decal edges. Curved panels may slightly need angled pressure.
Use short, overlapping strokes, and don’t rush. Most small and medium bubbles will disappear at this stage.
Step 3: Use Controlled Heat for Shape Memory
Vinyl “remembers” its shape. Gentle heat allows it to relax.
- Keep the heat moving
- Never overheat (if it’s uncomfortable to touch, it’s too hot)
- Smooth immediately after warming
This technique is especially helpful on doors and curved panels.
Step 4: Vent the Bubble (Only If Necessary)
For persistent air pockets:
- Pierce once at the edge of the bubble
- Smooth outward slowly
- Let the adhesive settle before driving or washing
Avoid washing or driving at highway speeds for at least 24 hours after fixing bubbles.
What About Wall Decals and Window Clings?
Wall decals depend on wall texture and paint quality. Smooth, semi-gloss surfaces work best. If bubbles appear:
- Try gentle pressure first
- Avoid pins unless absolutely necessary
- Understand that textured walls may trap air permanently
Meanwhile, Window clings don’t use adhesive, so bubbles usually mean moisture was trapped. Peel back the cling slowly, dry both surfaces, and reapply using light pressure.
When a Bubble Is Not Worth Fixing
A decal may need replacement if:
- The bubble contains visible debris
- The vinyl is creased or stretched
- Adhesive has fully failed
- The bubble distorts logos or text beyond acceptable appearance
Trying to “force-fix” issues often make the decal look worse — especially in customer-facing areas like storefronts or vehicles.
Final Thoughts
Bubbles don’t automatically mean failure. With a calm approach and the right technique, most post-application issues can be resolved without peeling, panicking, or reordering.
When custom decals are well-applied and properly maintained, they communicate clearly, build trust, and keep your brand looking polished.
FAQs
Can removing decals damage car paint?
Yes, especially if you use sharp tools, excessive heat, or harsh chemicals.
How long does decal removal take?
Small decals may take 10-15 minutes. On the other hand, larger or older graphics may take an hour or more.
Why does the paint look different afterward?
Paint under decals may be darker due to UV protection while the surrounding paint fades over time.
Is professional removal worth it?
For large fleet graphics or high-value vehicles, professional removal can reduce the risk of damage.
Related Articles

How to Prepare a Surface Before Applying a Decal
Learn how to prepare glass, walls, and vehicles before applying a decal with eSigns. Avoid peeling, bubbles, and adhesion issues with clear tips.
Read More →
How to Properly Apply a Window Decal
Learn how to apply a window decal with eSigns.com. Follow step by step alignment and hinge tips to avoid bubbles and crooked placement.
Read More →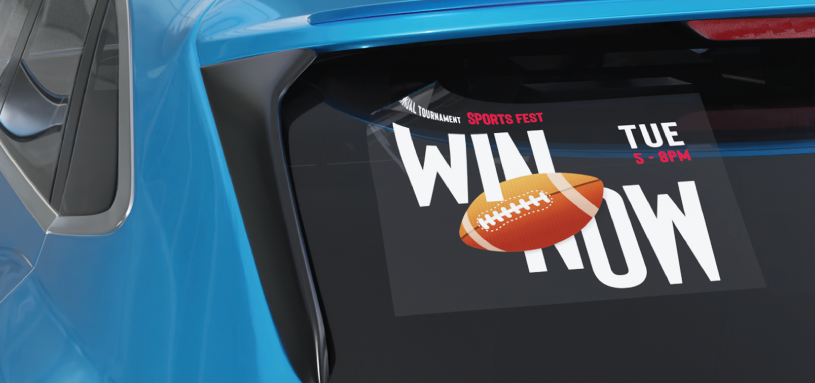
How to Remove Car Decals Without Damaging Your Paint
Learn how to remove car decals without damaging paint. This eSigns guide offers steps, method comparisons, and tips for DIY and business vehicles.
Read More →Data Subject Rights
Privacy Request
You may have certain rights with respect to the personal information we collect and process. These rights vary by state and country and depend on your residency. These rights are not absolute and we reserve all of our rights available to us at law in this regard. Please complete the below form to exercise one of your data subject rights, where applicable. We will process your request within the time provided by applicable law.